To create a new shipment, follow these steps:
1. The items you want to ship will automatically appear in the "Items to pack" section. This section is optional for non-customs affecting shipments
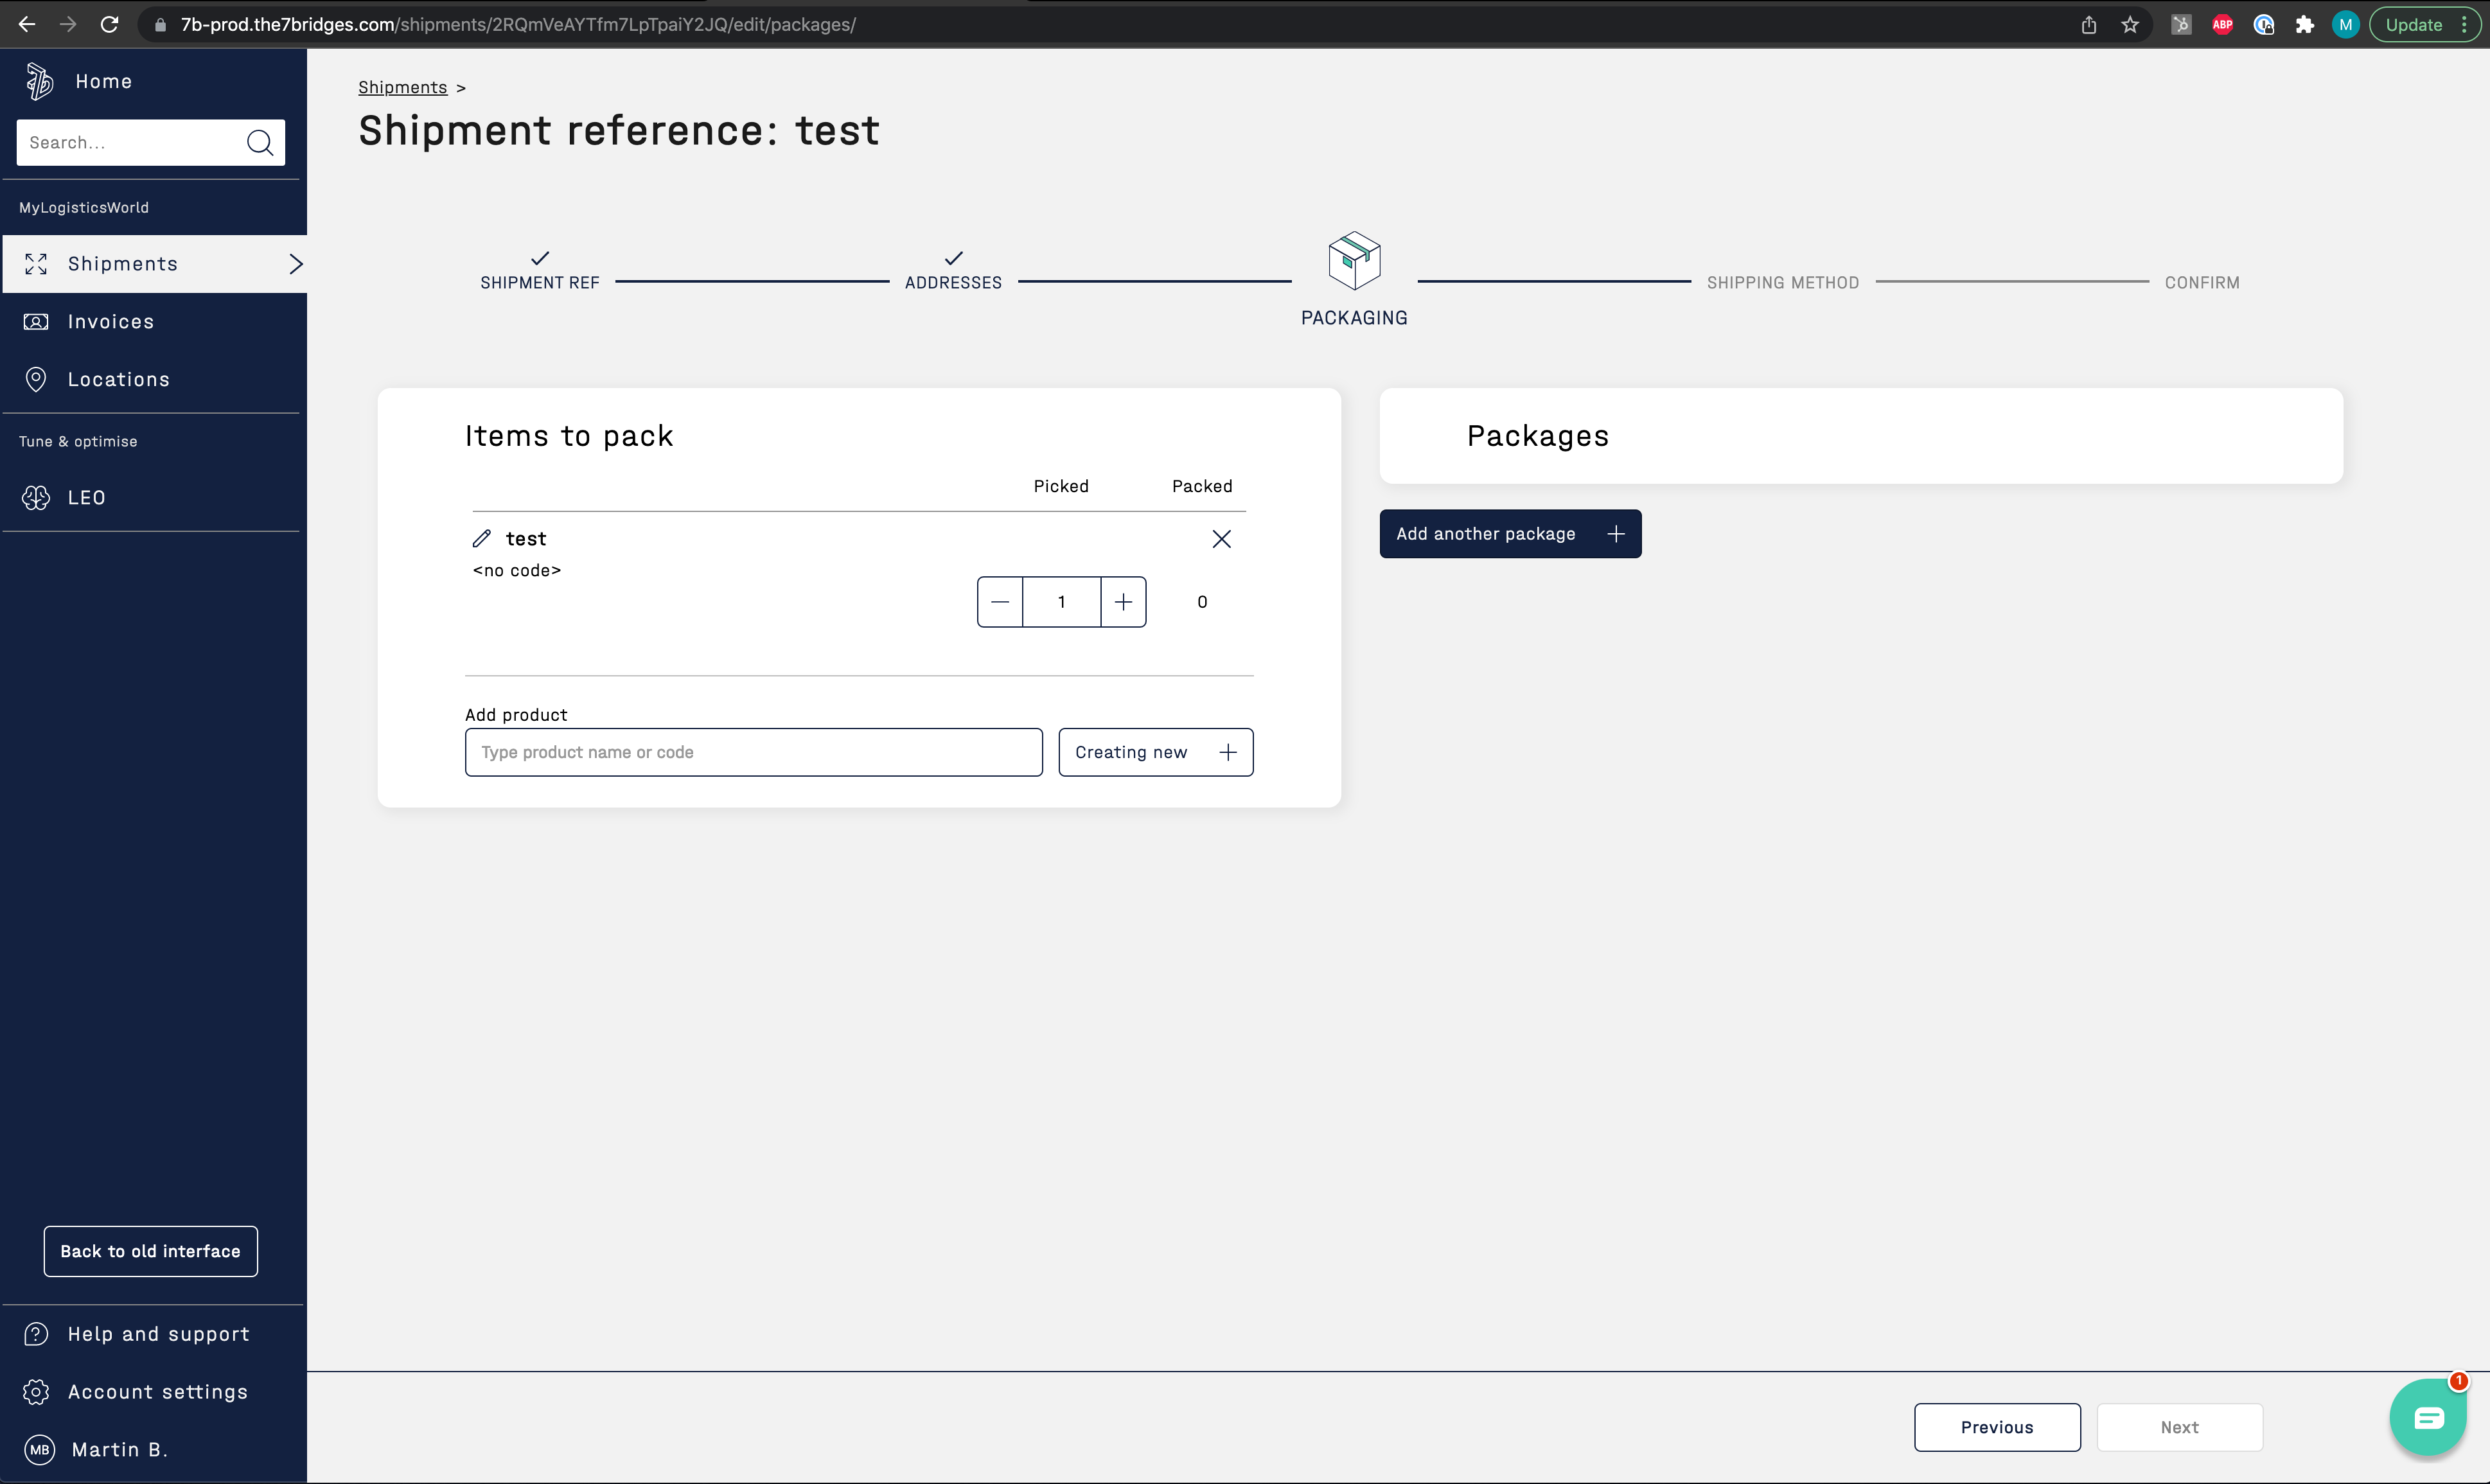
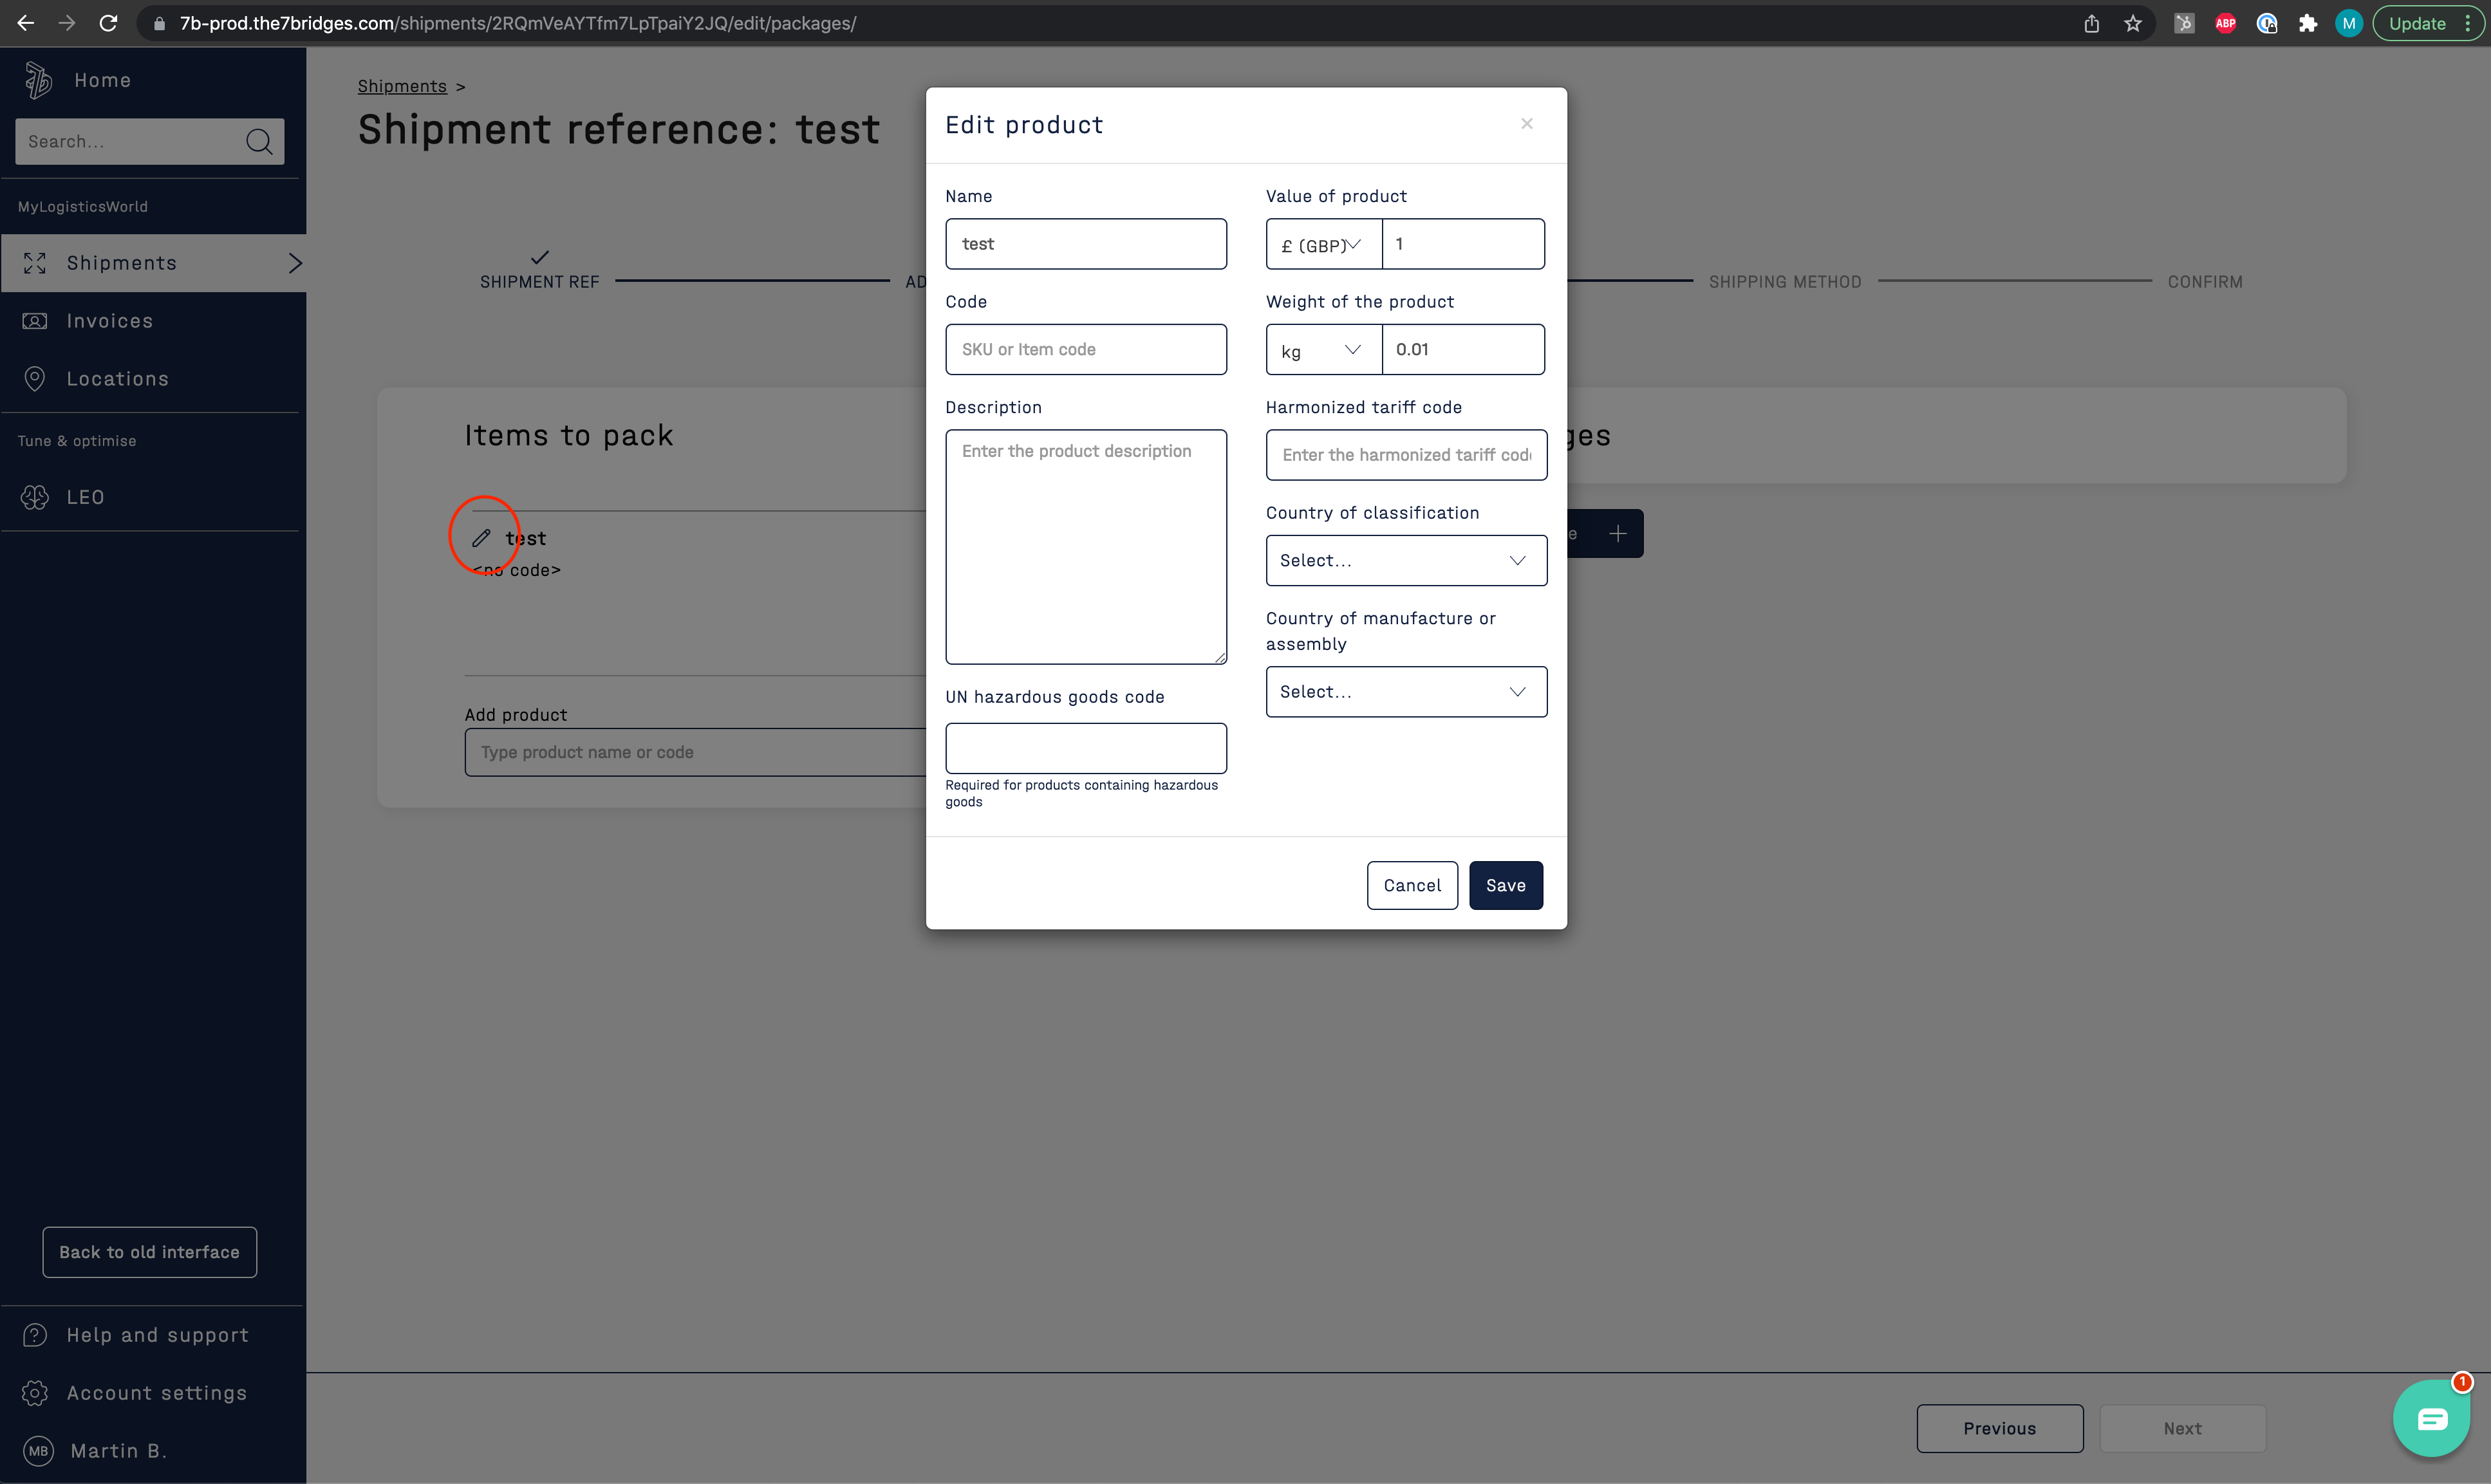
2. You can add a new product to the 'Items to pack' section by clicking on the edit icon and entering all the relevant information
3. Once you have selected the items to pack, you will need to add a package. To do this, go to the package section on the right and select a pre-saved package suitable for the item being shipped. Alternatively, you can create a custom package by clicking on 'create a custom package' and entering the necessary dimensions
4. Make sure to add a package identifier and the total package weight before proceeding
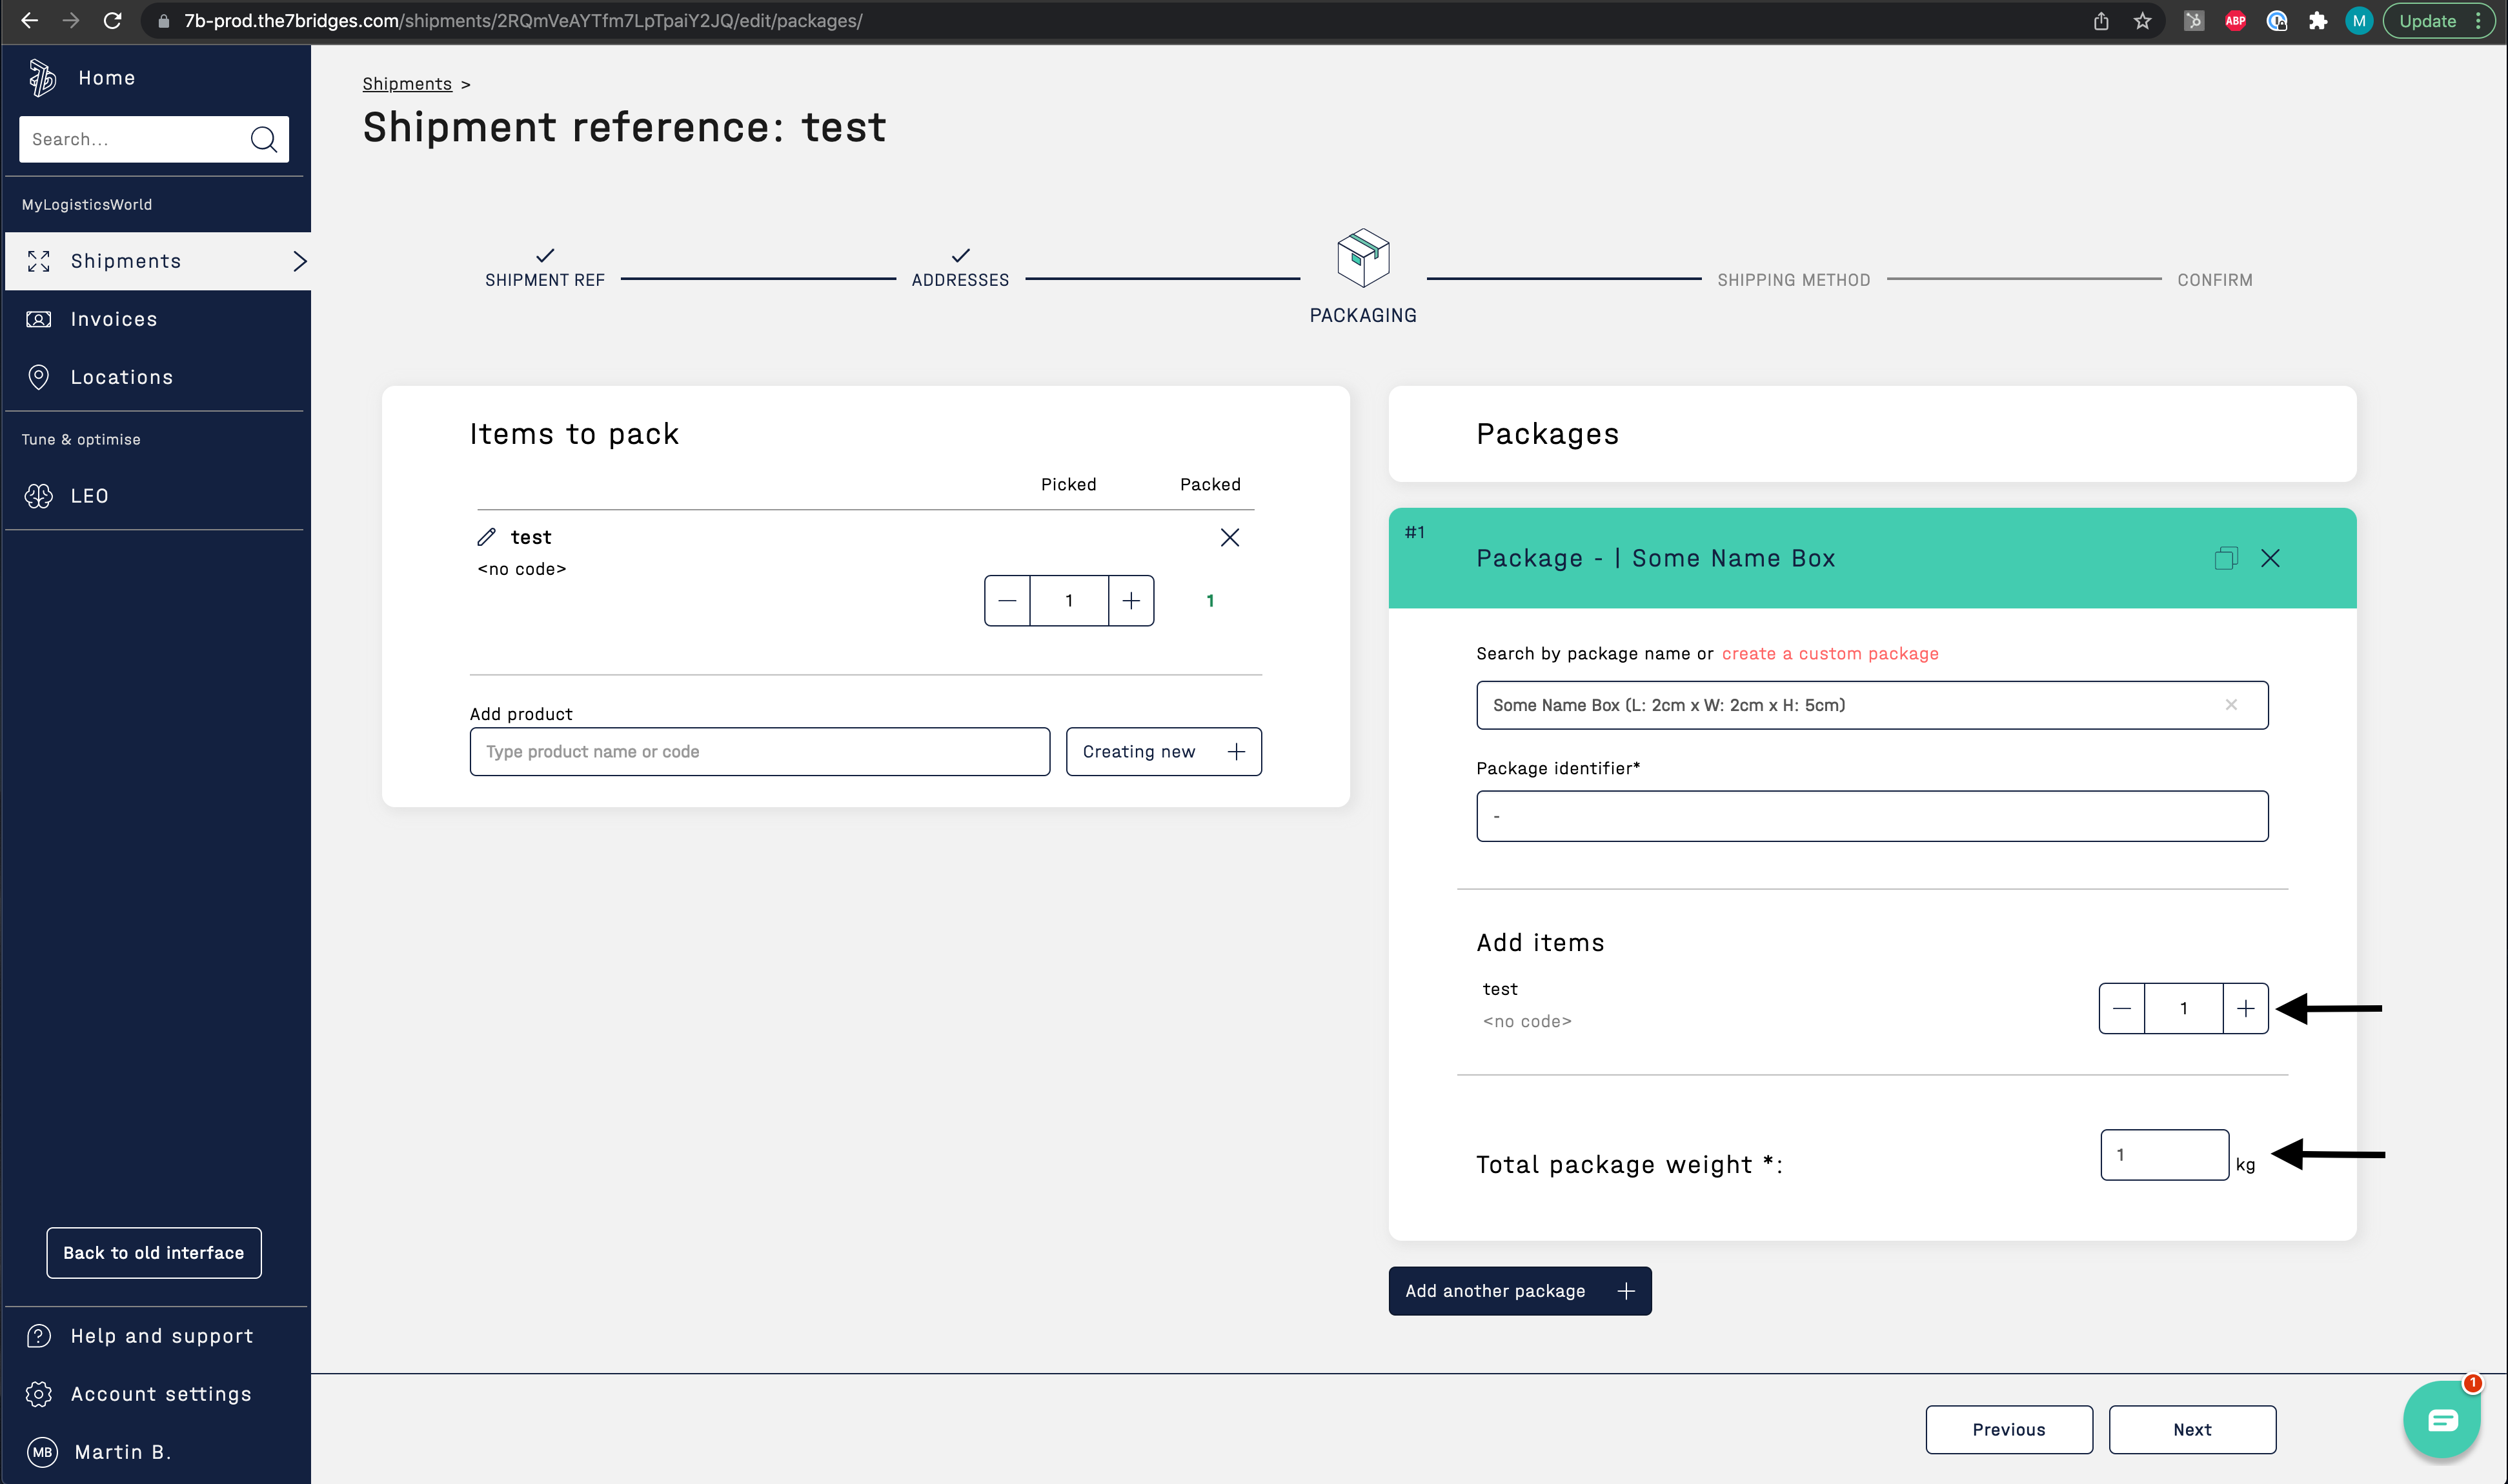
5. If you need to add another package, select 'Add another package'
Note: For domestic shipments where auto-rates have been selected, you can press the 'Book and Print Label Docs' button, which will automatically select the right rates and take you to the confirmation page. Otherwise, the next step is the customs page.