
Introduction
The Data exports tab in the Data manager section lets you set up recurring deliveries of your 7bridges data, called data feeds. You can choose what data to include, how often it is delivered and who should receive it, as well as monitor the outcome of each delivery.
👉 Note: Data exports is an add-on service and must be discussed and agreed with your Customer Success Manager before it can be enabled for your account. Once enabled, only users with the Local Admin role can create and manage data feeds.
What is a data feed?
A data feed is a recurring export of selected data from your account. Each time the feed runs, 7bridges collects the data you've selected, saves it as a file and emails a download link to your chosen recipients.
You can have feeds for two different datasets:
- Shipment: one row per shipment.
- Charge: one row per charge on a shipment.
👉 Note: By default, each account can have one active feed per dataset: one Shipment and one Charge. If you reach this limit, you'll need to deactivate an existing one before activating another. If you require additional active feeds, please discuss your requirements with your Customer Success Manager.
How do I read the Data exports list?
The Data exports tab lists all your data feeds. If you haven't created one yet, select Create data feed to get started.
For each data feed, you'll see:
-
Name: the name given to the data feed.
-
Dataset: Shipment or Charge.
-
Frequency: Weekly or Monthly.
-
Export type: how the data is delivered.
-
Fields: the number of fields included.
-
Status: Active data feeds are scheduled to run, while Inactive data feeds are paused.
-
Last run: the outcome and time of the most recent run.
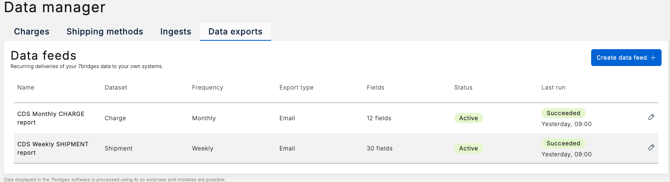
👉 Note: Select any row to view the data feed summary.
How do I create a data feed?
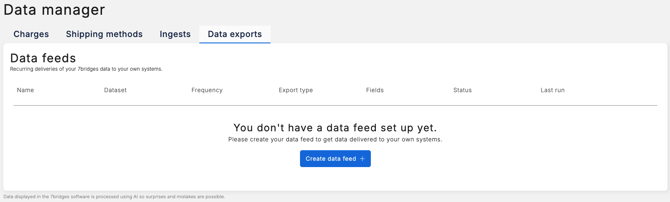
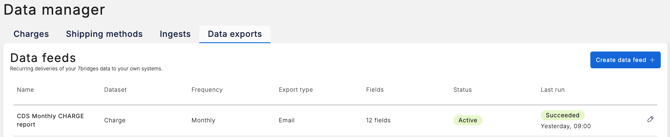
- Select the Create data feed button.
- If you haven't created a data feed yet, the button is displayed in the center of the page.
- If you already have a data feed, the button is displayed in the top-right corner of the page.
- If you haven't created a data feed yet, the button is displayed in the center of the page.
- Fill in the form:
- Name: enter a unique name for the data feed.
- Active: this is switched on by default. Switch it off if you want to create the data feed without starting recurring deliveries.
- Dataset: select Shipment or Charge.
- Frequency: select Weekly or Monthly.
- Data delivery date: for Weekly data feeds, select any day of the week. For Monthly data feeds, select a date from the 1st to the 28th to ensure the selected date is available every month.
- Export type: the current option is Email. Recipients are emailed a link to download the data as a CSV file.
- Recipients (optional): enter an email address and press Enter to add it. Each recipient will receive an email when the data feed runs.
- 👉 Note: Although Recipients is optional, a scheduled run will fail if no recipient email address has been added.
- Fields (optional): select the fields you want to include in each delivery. Shipment datasets have 30 available fields, while Charge datasets have 12. Use Select all to include every available field.
- 💡 Tip: If you change the dataset when editing a data feed, check your selected fields, as some may not be available for the new dataset.
- Select

- A summary of your data feed will be displayed, where you can review how it has been configured.
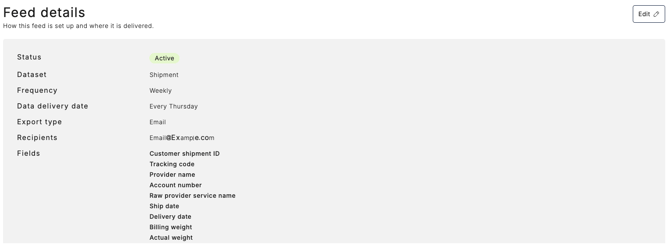
👉 Note: Once the data feed has run for the first time, its Run history will be displayed at the bottom of the page, whether the run succeeds or fails.
What fields can I include?
Fields are grouped by what they describe. A few, such as customer shipment ID and tracking code, are available for both datasets.
- Shipment feeds: include fields such as provider and account details, ship and delivery dates, billing and actual weight, origin and destination address details, references, and package details such as count, type, weight and dimensions.
- Charge feeds: include fields such as charge ID and name, standardised charge name, charge category, original net charge and currency, invoice number and invoice date.
Example Shipment fields: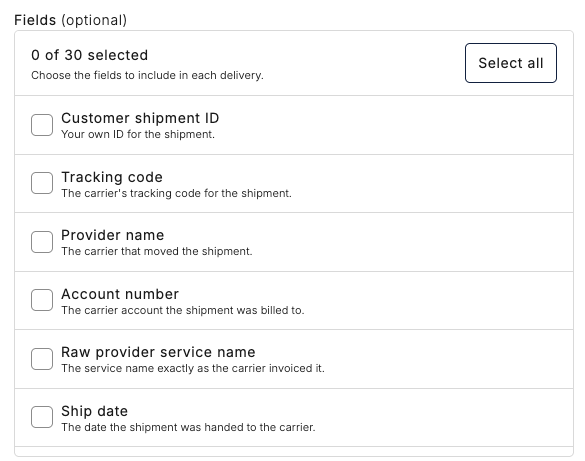
How do I edit or pause a data feed?
- From the Data exports tab, select the data feed you want to update.
- The data feed summary page will open. Select Edit in the top-right corner:

- Make the required changes, then select Save.
To pause a data feed, switch Active off when editing. The data feed will stop running until you switch Active back on. Your existing Run history will be retained.
👉 Note: Reactivating a data feed counts toward the active feed limit for that dataset.
How do I check whether a delivery worked?
Select a feed's name in the list to open its summary page. It has two sections:
- Feed details: how the feed is set up, including its recipients.
- Run history: every delivery, newest first.
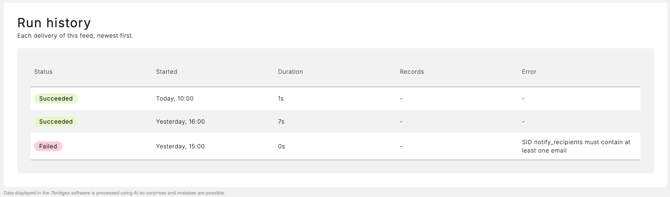
The Run history table shows:
- Status: the outcome of the delivery:
- Running: still in progress.
- Succeeded: the export completed successfully and recipients were sent a download link.
- Failed: the delivery didn't complete. The reason is shown in the Error column.
- Unknown: the delivery started but no outcome has been reported yet.
- Started: when the delivery began.
- Duration: how long it took.
- Records: the number of records delivered, for successful runs.
- Error: the reason a delivery failed.
👉 Note: If a data feed has not run yet, the Run history table is not visible.
What should I do if a delivery fails or doesn't arrive?
- Open the data feed summary and check the Run history.
- If the run shows Failed, review the information in the Error column.
- Check that each Recipient email address is correct and ask recipients to check their junk or spam folder.
- Check that the feed is still Active and that its Data delivery date is the one you expect.
- If the data feed is Weekly, change the Data delivery date to today and allow up to 4 hours for the data feed to run. Once it has run, change the day back to the required day for the following week.
- If the data feed is Monthly and today's date is between the 1st and 28th, change the Data delivery date to today's date and allow up to 4 hours for the data feed to run. Once it has run, change the date back to the required date for the following month.
If the issue continues, contact the Customer Support team and include the feed name and the date of the affected run.